🔧 Oil Dripping From Kitchen Chimney? 5-Minute Fix
🎯 Quick Answer
Problem: Oil dripping from kitchen chimney onto hob or floor?
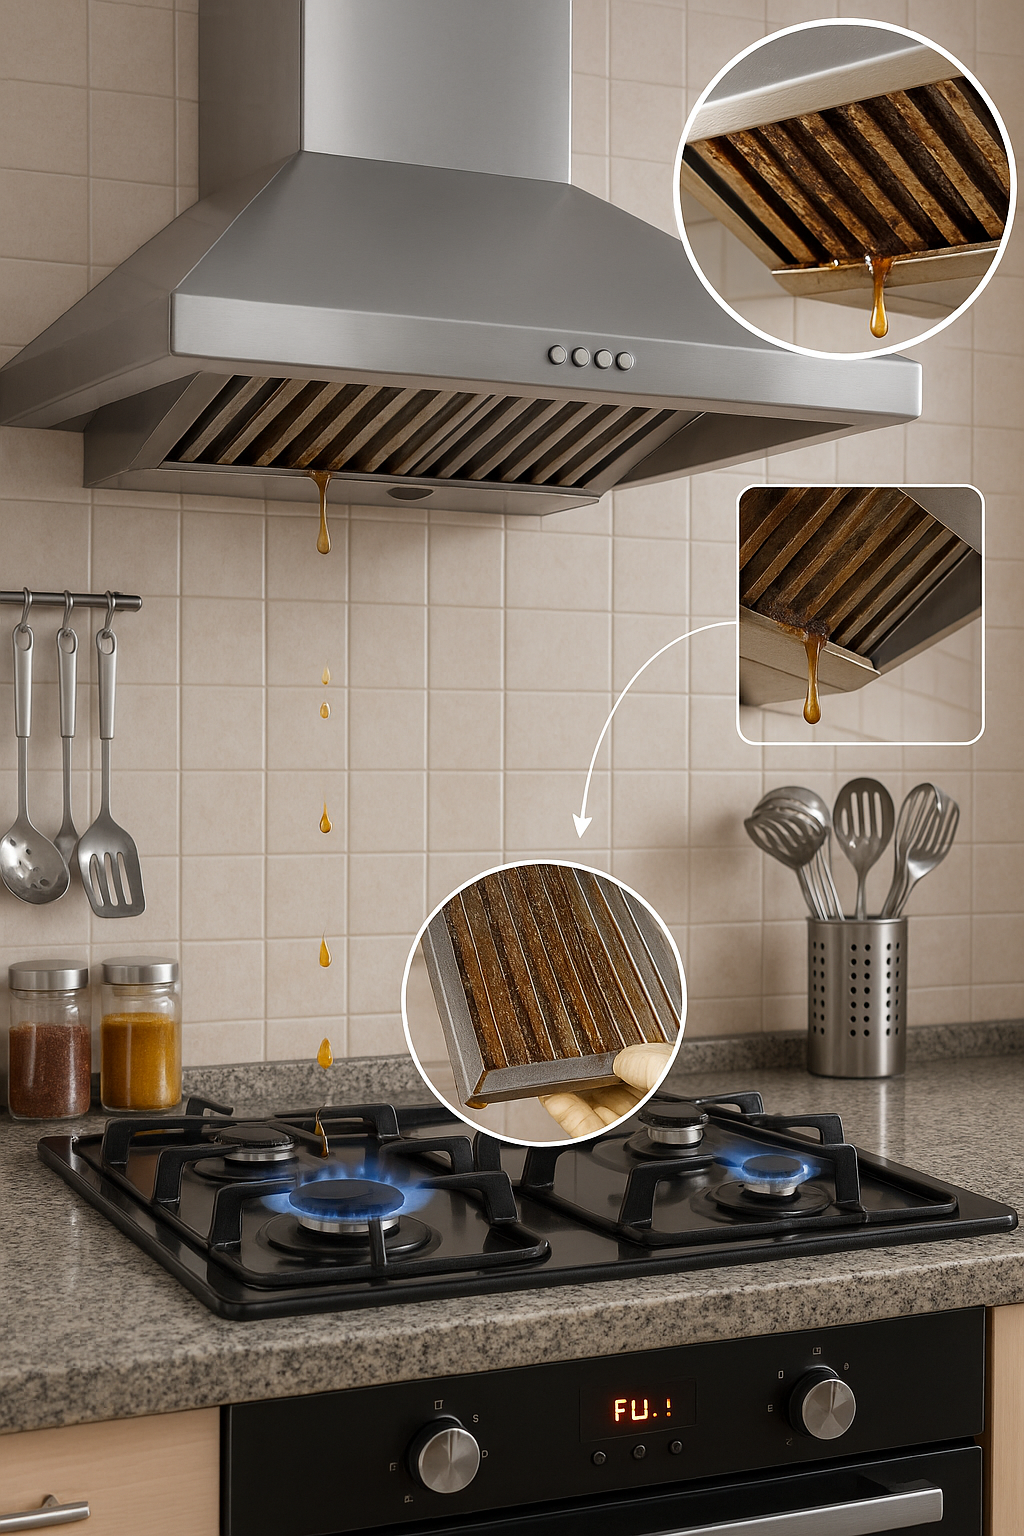
Most Common Cause: Saturated baffle/mesh filters that need immediate cleaning (90% of cases). Other causes: overfilled oil tray (auto-clean chimneys), wrong tilt angle, or poor duct installation.
Quick Fix (5 minutes):
- Switch off and unplug chimney
- Remove and soak filters in hot water + dish soap + baking soda (30 min)
- Empty oil collection tray if you have auto-clean model
- Check chimney is level (oil should drain to tray, not backwards)
- Scrub filters, dry completely, reinstall
Problem Overview
Sticky oil dripping from the kitchen chimney or falling back on the hob usually points to filter saturation or ducting/installation issues. This happens with all brands (Faber, Elica, Glen, Hindware, etc.). Use this checklist to fix it fast.

Safety First
-
!
Switch off appliances: Switch off the chimney and hob before cleaning to prevent accidents.
-
!
Wear protection: Wear gloves as degreasers can irritate skin. Unplug if you will remove filters or clean inside.
🔍 Quick Checks ⏱️ 5 minutes
1 Filter Saturation
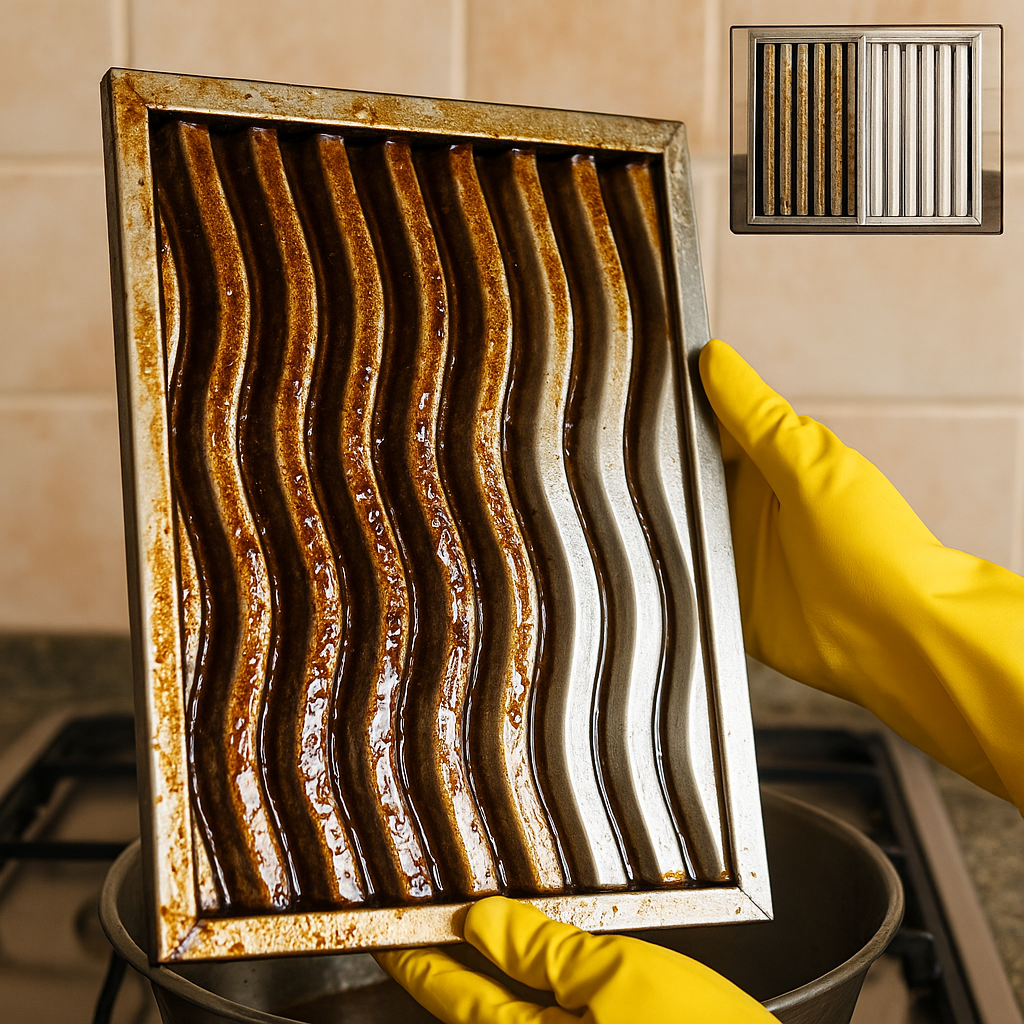
Baffle/mesh filters look brown or blocked? If yes, clean immediately.
2 Oil Collector Tray
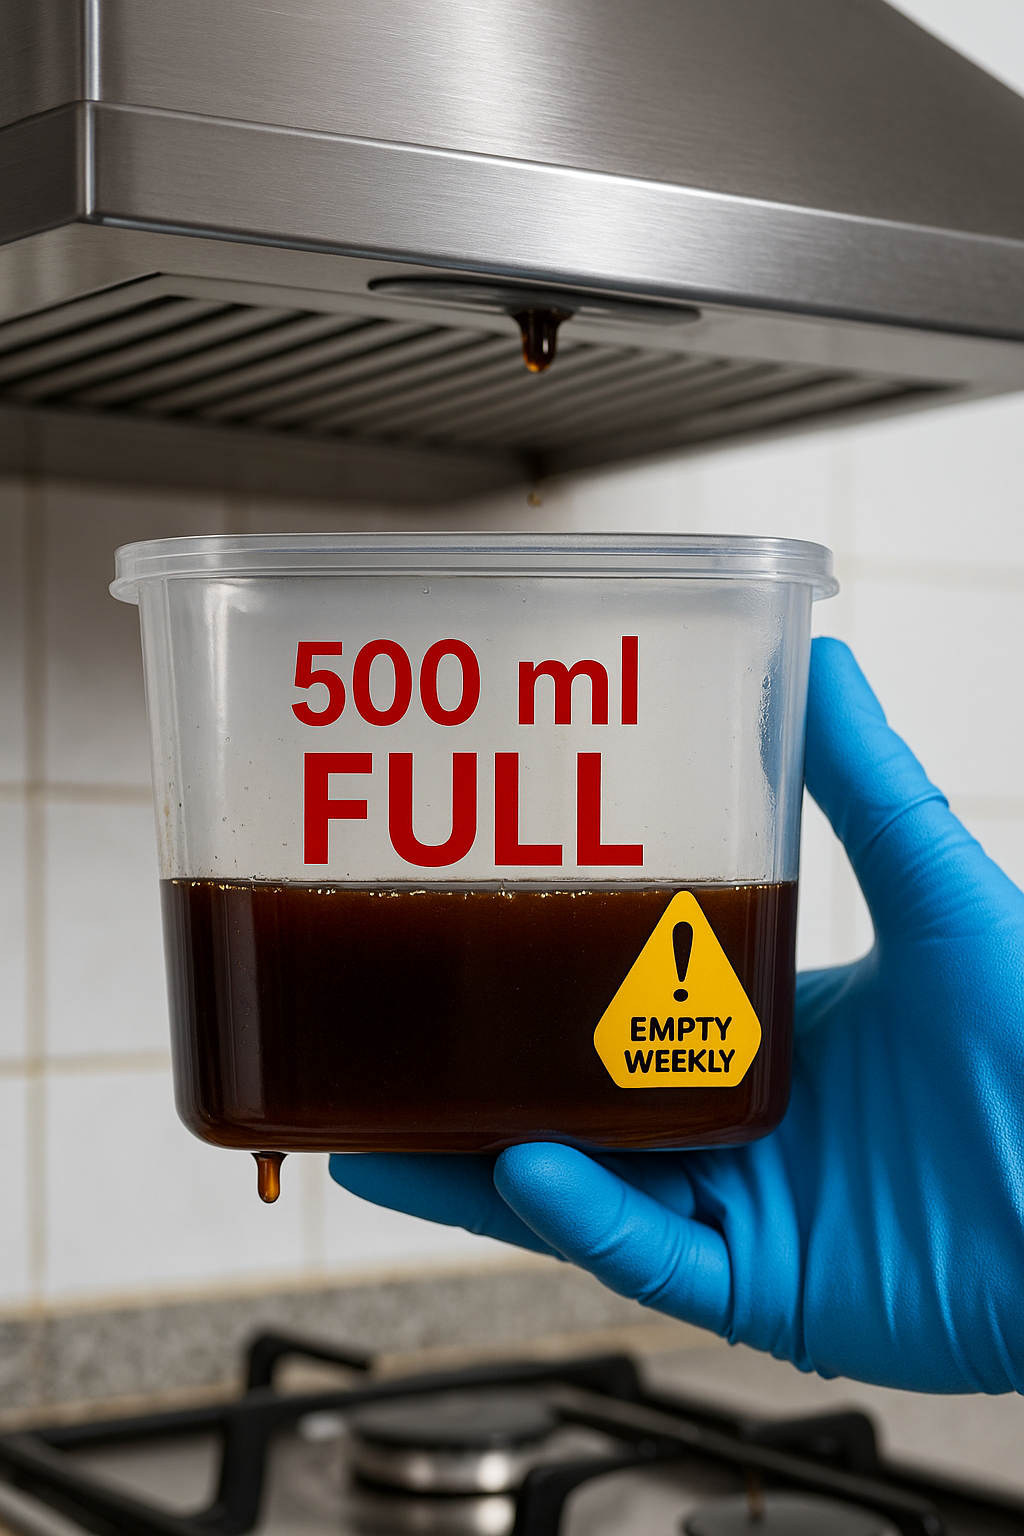
For auto-clean models: Is the tray full? Empty and wipe clean.
3 Chimney Tilt & Level
Ensure the unit is level; oil should drain into the tray, not back to the hob.
4 Duct Slope
Maintain a slight upward slope from hood to outside; avoid dips where oil condenses.
5 Duct Length & Bends
Keep ≤2–3 bends; excessive length/bends cause vapour condensation.
6 Cowl/Rain-cap Outside
Ensure it's present and clean to prevent back-drip from outside.

Saturated baffle filter with heavy oil buildup - the #1 cause of oil dripping (90% of cases)
🛠️ DIY Fixes You Can Do Now
Clean Filters
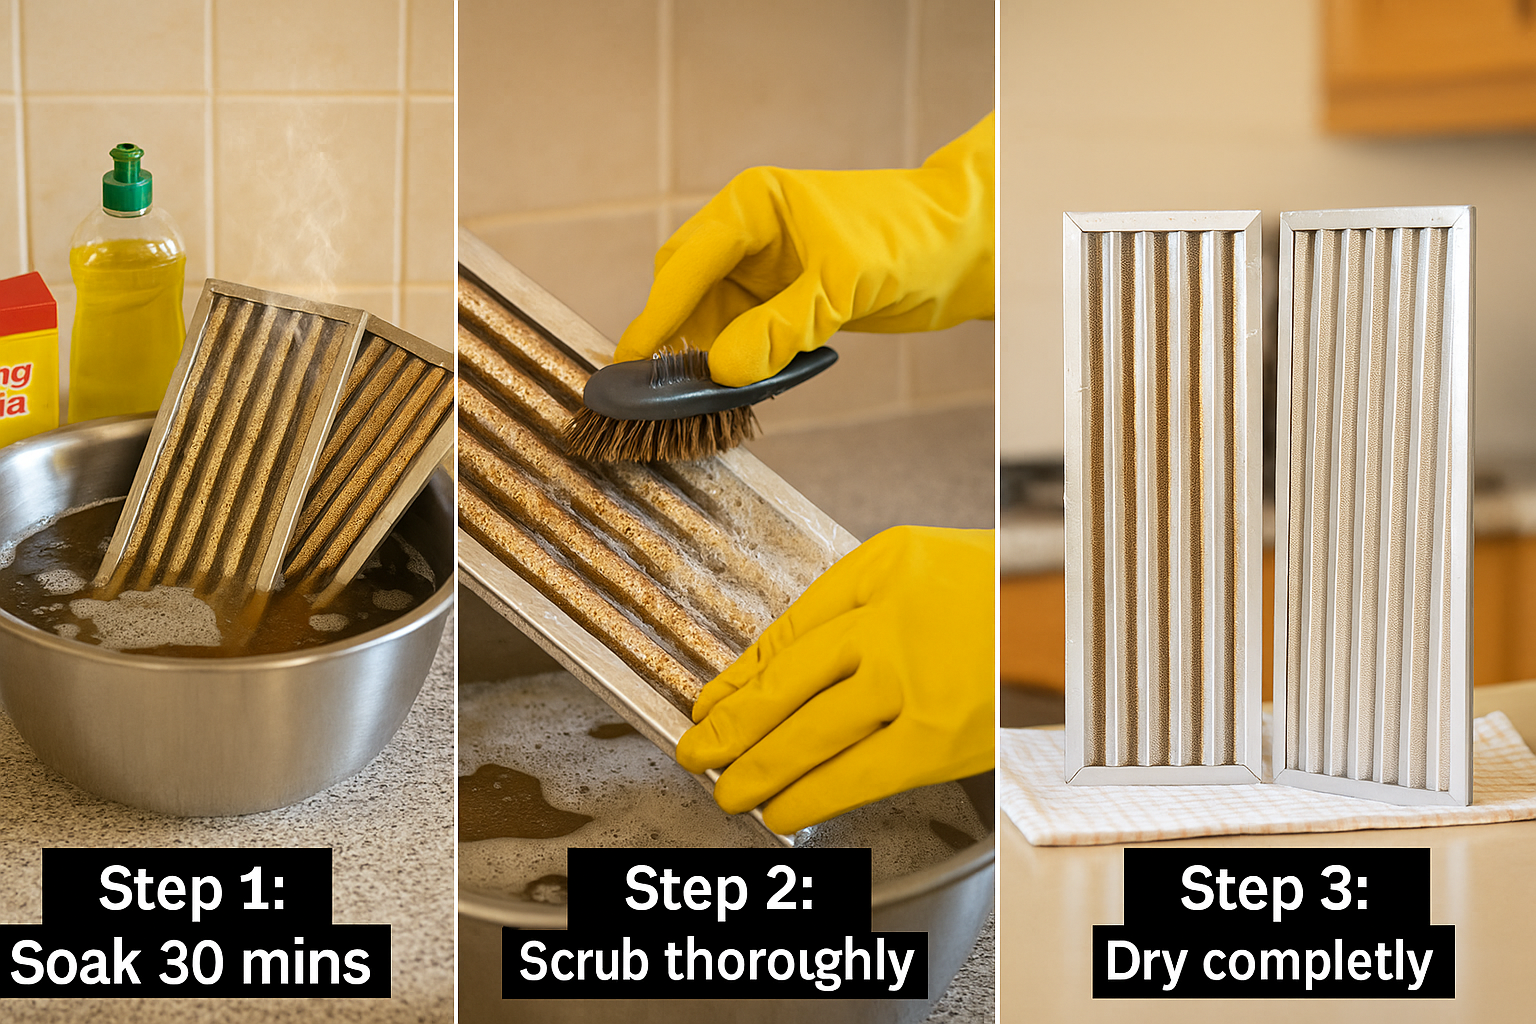
Soak filters in hot water + dish soap + a spoon of baking soda for 30-40 minutes. Scrub thoroughly, rinse, and dry completely before reinstalling.

Follow this 3-step process for effective filter cleaning: Soak 30 mins → Scrub thoroughly → Dry completely
Auto-clean Cycle
Run the auto-clean cycle as per manual instructions. Empty and clean the oil tray after each cycle.

Auto-clean chimney oil tray at full capacity (500ml) - empty weekly for heavy frying to prevent overflow dripping
Seal Gaps
Check and reseal all duct joints with aluminum tape to prevent leaks and oil seepage.
Adjust Suction Speed
Use lower speed for simmering, high only for frying/tadka. This prevents excessive oil vapor collection.
💡 Installation Issues (Call Installer)
Wrong Height
Chimney too high or low from hob
Solution
Ideal: 24-30 inches above hob (check manual)
Incorrect Tilt
Oil draining backwards
Solution
Adjust so oil drains forward to tray
Ducting Issues
Too many bends or wrong material
Solution
Use 6-inch smooth metal duct, reduce bends
Heavy Build-up
Motor & housing need cleaning
Solution
Professional service required
🛡️ Maintenance Schedule for Indian Cooking
Baffle Filter
Clean every 2-4 weeks for heavy frying
Oil Tray
Empty every 1-2 weeks (auto-clean models)
Deep Service
Professional cleaning every 6-12 months
💡 Tip for Heavy Frying: Prefer baffle filters over mesh filters and ensure correct ducting. Regular cleaning prevents oil pooling and dripping.
📞 When to Call a Professional
🔧 Installation Issues
- • Chimney height adjustment needed
- • Ducting needs reconfiguration
- • Tilt/level correction required
- • Outdoor cowl installation
⚡ Service Required
- • Motor making unusual noise
- • Heavy grease build-up inside
- • Auto-clean function not working
- • Persistent oil dripping after cleaning
⚠️ Disclaimer: This guide is for basic maintenance only. For electrical issues or major repairs, always consult authorized service centers. Regular maintenance extends chimney life and ensures kitchen safety.
❓ Frequently Asked Questions
Q: Why is oil dripping from my kitchen chimney even after cleaning filters?
A:
If filters are clean but oil still drips, check: (1) Chimney tilt - ensure it's level so oil drains to tray, not backwards; (2) Oil collection tray - empty it if full; (3) Duct installation - ensure upward slope with no dips where oil pools; (4) Motor housing - may need professional cleaning if heavily clogged. Also verify filter is completely dry before reinstalling.
Q: How often should I clean chimney filters to prevent oil dripping?
A:
Heavy frying (Indian tadka/deep frying): Clean filters every 2-3 weeks. Moderate cooking: Every 4-6 weeks. Light cooking: Every 2-3 months. For auto-clean chimneys, run the auto-clean cycle weekly for heavy use, bi-weekly for moderate. Empty oil tray after each auto-clean cycle. Saturated filters are the #1 cause of oil dripping.
Q: What is the best way to clean baffle filters at home?
A:
Best method: Soak filters in hot water + 2-3 spoons dish soap + 1 spoon baking soda for 30-40 minutes. Scrub with stiff brush, rinse thoroughly, air dry completely (4-6 hours or overnight). For stubborn grease: Add vinegar or use commercial degreaser. Never: Put filters in dishwasher (damages coating), use abrasive scrubbers (scratches surface), or reinstall while wet (causes dripping and electrical issues).
Q: Does oil dripping mean my chimney installation is wrong?
A:
Not always. 90% of oil dripping issues are due to filter saturation - clean filters first. However, installation issues can cause persistent dripping: (1) Wrong height from hob (should be 24-30 inches per manual); (2) Incorrect tilt causing oil to drain backwards; (3) Duct with too many bends or downward slopes; (4) Missing rain cap/cowl causing outdoor moisture backflow. If cleaning doesn't fix it, call installer to check these.
Q: Can I use my chimney while oil is dripping?
A:
No, stop using immediately. Dripping oil can: (1) Fall on open flames causing fire hazard; (2) Damage hob surface and knobs; (3) Create slip hazards on floor; (4) Worsen motor/housing grease buildup. Clean filters or empty oil tray immediately. Use chimney only after fixing the dripping issue. If urgent, cook on low flame temporarily and place newspaper under drip area until you can fix it.
Q: Is filterless/auto-clean chimney better than baffle filter to avoid dripping?
A:
Both can drip if not maintained. Auto-clean chimneys collect oil in a tray that needs regular emptying (weekly for heavy use). Filterless chimneys still have baffles that auto-clean but the tray can overflow causing drips. Traditional baffle filters need manual cleaning but give you visual feedback on saturation. Best practice: Auto-clean chimneys for convenience but empty tray regularly; baffle filters for visual control and lower cost, clean every 2-4 weeks.
Q: Should I call a technician for chimney oil dripping issue?
A:
Try DIY fixes first: Clean filters, empty oil tray, check level/tilt. This solves 90% of cases. Call technician if: (1) Dripping continues after filter cleaning; (2) Motor makes unusual noise; (3) Auto-clean function doesn't work; (4) Heavy grease buildup inside motor housing; (5) Chimney needs height/tilt adjustment; (6) Ducting reconfiguration required. Technician visit costs ₹300-800. DIY fixes save money and time.
Important Safety Reminder
If you're not comfortable with any step, or if the problem persists after trying these solutions, please contact a qualified technician. Safety should always be your first priority when dealing with electrical appliances.
You May Also Like
Discover more helpful guides and reviews to make informed decisions
Autoclean vs Filter Kitchen Chimney: Complete 5-Year Cost Analysis 2025
Complete comparison guide for choosing between autoclean (filterless) and filter-based kitchen chimneys for Indian cooking. Compare costs, maintenance, performance and 5-year total ownership cost.
AMOLED vs IPS LCD 2025: Which Phone Display is Better? (Eye Comfort Test)
AMOLED: infinite contrast & Always-On Display vs IPS LCD: no PWM flicker & no burn-in. Complete comparison for ₹15k-₹35k phones. PWM sensitivity test, battery life, brightness, real-world usage guide.
Front Load vs Top Load Washing Machine 2025: Which Saves More? (Real Data)
Front load saves ₹904/year on water but top load washes 40% faster. Complete comparison with actual running costs, fabric care, maintenance for Indian homes. Find which type suits your family size & budget.
Inverter vs Non-Inverter AC 2025: Which Saves More Money? (₹ Calculator)
Complete comparison: Inverter AC saves ₹5,000/year on bills for 8hr/day use vs non-inverter. Temperature stability, noise, efficiency & real electricity cost breakdown for Indian summers 2025.
Instant vs Storage Geyser 2025: Which Saves More Electricity? (Power Calculator)
Storage geyser (2kW) vs instant (3-6kW): Storage better for Indian homes with limited electrical capacity. Complete comparison of power consumption, winter performance, space needs & costs for bathrooms.
Latex vs Memory Foam Mattress 2025: Which Stays Cooler? (Temperature Test)
Latex sleeps 3-4°C cooler than memory foam in Indian summers. Complete comparison: durability (latex 12+ years vs foam 6-8), price, support, comfort. Which mattress for hot sleepers?
Microfiber vs Memory Foam Pillow 2025: Which for Neck Pain? (Support Test)
Memory foam gives consistent neck support vs microfiber loses shape. Compare: washability (micro wins), cooling (micro cooler), price (₹500-₹2k vs ₹1.5k-₹5k), durability, sleep positions.
Oil-filled vs Fan Heater 2025: Which for Delhi/Punjab Winters? (Cost & Silence Test)
Oil-filled heaters save ₹500-₹1,200/winter through heat retention vs fan heaters (quick 5-min warmup). Compare silence (0 dB vs 50 dB), safety for kids, running costs @₹8/kWh for Delhi-NCR, Punjab, Haryana winters.
Vertical vs Horizontal Geyser 2025: Which Gives Better Hot Water? (Space Guide)
Vertical geysers give 15-20% more consistent hot water vs horizontal. Compare space needs (18"×14" vs 24"×10"), installation cost (₹500-800 difference), thermal efficiency & real Indian bathroom fits.
Need to Buy a New Kitchen Chimney?
Check out our comprehensive buying guides and reviews